Honest Guide to Hanumanasana for Beginners
Let’s be real for a second. The first time I saw someone do Hanumanasana or what we call Monkey Pose in the West—I actually laughed out loud. I was sitting in a hot yoga studio in Mumbai, completely drenched in sweat, and the woman next to me just casually slid into the full splits. Her front leg was pointing straight ahead, her back leg was perfectly squared, and her hands were lifted to the sky in a prayer position. She looked like a statue in a temple.
I, on the other hand, looked like a baby deer trying to stand on ice.
I’m telling you this because if you’ve ever scrolled through Instagram and thought, “I will never be able to do that,” I get it. Hanumanasana is intimidating. It’s the kind of pose that makes seasoned yogis gulp. But after years of practicing (and yes, struggling), I’ve learned that this pose is so much more than a fancy party trick. It’s a journey.
So, grab a block, maybe a blanket, and let’s talk about why Hanumanasana is worth the effort.
What is Hanumanasana?
Let’s first examine the meaning of the word. Hanuman, the Hindu monkey-god, is a symbol for strength, faith, and devotion. Hanuman’s pose symbolizes his epic jump between the southern tip India and the island of Lanka.
When you come into this asana, you’re physically mimicking that giant leap. Your front leg reaches forward into the future, and your back leg anchors you in the past. It’s a pose about bridging gaps, taking risks, and opening up.
The Technical Bit:
In simple terms, it’s a frontal split. Your hips are squared to the mat, your front leg extends straight out in front with the toes pointing up, and your back leg extends straight behind with the top of the foot on the floor.
But let’s be honest—it looks way easier than it feels.
The Real Hanumanasana Benefits | That Go Beyond Flexibility
I know, I know. Everyone talks about the hamstring stretch. But if I’m being real with you, the physical flexibility is just the tip of the iceberg. Here’s what actually happens when you start working on this pose.
1. Hip Opener & We Store Everything There
We carry a lot of tension in our hips. Stress, long hours of sitting, anxiety—it all gets locked in the hip flexors and hamstrings. Hanumanasana forces you to confront that.
When I first started practicing, I wasn’t just tight; I was emotionally frustrated. I remember one specific session in my apartment in Delhi where I was using a block under my front thigh, barely an inch off the ground, and I just started crying. No reason. Just a release. That’s the power of deep hip work. It’s not just about touching your toes; it’s about letting go of the junk you’ve been holding onto.
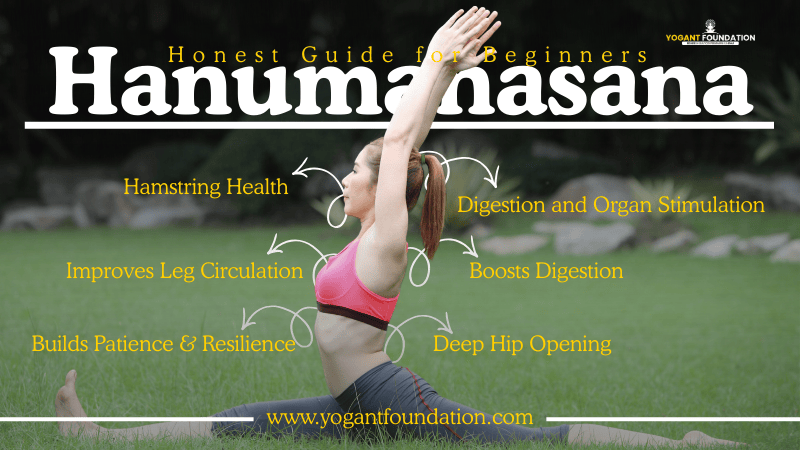
2. Hamstring Health
If you run, play sports, or even just walk a lot, your hamstrings can get tight or imbalanced. Monkey Pose stretches the front hamstring of the front leg and the hip flexor of the back leg. It’s a two-for-one deal. Keeping these muscles long and supple can actually help prevent lower back pain.
3. Digestion and Organ Stimulation
Deep groin and hip stretches stimulate the abdominal organs. The fold over the front leg can help massage the digestive tract. It’s not a twist, but the compression and release of blood flow in the pelvic region is fantastic for gut health.
4. The Mental Leap
Honestly, this is the biggest benefit. Hanumanasana teaches you patience. You can’t force it. If you force the splits, you tear a hamstring. You have to breathe, show up, and trust the process. In a world where we want everything instantly, this pose reminds us that some things—like inner peace and open hips—take time.
How to Actually Prepare for Monkey Pose
Look, I’m not going to tell you to just “sit down and slide out.” That’s a recipe for a pulled muscle. You need to warm up. Treat your body like a rubber band—you can’t stretch it if it’s cold.
Here’s my go-to prep sequence that I do every single time.
1. Low Lunge | Anjaneyasana
Start here. This warms up the hip flexors of the back leg. Sink your hips down, tuck your tailbone slightly, and try to lift your arms up. Hold for five deep breaths. You should feel a stretch in the front of your back thigh.
2. Half Split | Ardha Hanumanasana
This is the most important prep pose.
- From your low lunge, shift your hips back over your back knee.
- Straighten your front leg, flex your front foot hard.
- Hinge forward from your hips—don’t round your spine.
Pro Tip: If your back starts to hurt here, bend your front knee a little. You want the stretch in your hamstring, not your spine. I usually stay here for ten long breaths, trying to walk my fingertips out.
3. Pyramid Pose | Parsvottanasana
This is a standing hamstring stretch that also helps square your hips.
- Stand with one foot about 3-4 feet behind the other.
- Hinge forward over your front leg.
- Try to keep your hips pointing forward. You’ll feel this in the standing hamstring.
4. Dynamic Kicking
Once I’m warm, I like to play with the movement. From a kneeling position, I’ll slide my front foot forward just a tiny bit, then slide it back. I do this a few times, like I’m testing the waters. It sends a signal to the brain saying, “Hey, we’re moving, don’t panic and lock up.”
Step-by-Step: Getting into Hanumanasana
Alright, you’re warm. You’ve got your blocks nearby. Let’s try it. Remember, the finish line isn’t touching the floor. The finish line is feeling good.
Kneel down: Come onto your knees. Take a deep breath in.
Extend the front leg: Exhale and extend your right leg forward. Place your heel on the mat. Don’t worry about how far forward it is.
Square the hips: This is the tricky part. Look down at your hips. Are they twisted? Usually, the hip on the side of your back leg wants to fly open. Tuck that hip under. Imagine your hip points are like headlights on a car, and they both need to point straight ahead to the front wall.
Support yourself: Place your hands on blocks or the floor on either side of your hips.
The Slide: Very slowly, begin to shift your weight back through your back knee. Let your front heel slide forward. Stop the second you feel a sharp pinch. We want a “stretching” sensation, not a “tearing” sensation.
Stay and Breathe: Find your edge. If you’re shaking, that’s okay. Stay here for 3-5 breaths.
Come out: Press into your hands, shift your weight forward, and carefully pull your front leg back in. Shake it out.
To come deeper: If you feel stable and the stretch is manageable, you can start to walk your hands forward, or even lift your arms up.
Common Mistakes I Made | So You Don’t Have To
I’ve definitely had my fair share of “Oops” moments in this pose. Here’s what to watch out for.
- The Twisted Hip: This is #1. If your back hip is pointing toward the ceiling, you aren’t doing Hanumanasana; you’re doing a fancy side split variation. You lose the stretch on the hip flexor and risk straining your SI joint. Keep those hips square, even if it means you don’t go as far forward.
- Rounded Back: Don’t hunch over your front leg to get lower. Lengthen your spine. Think about your chest leading forward, not your head dropping down.
- Forcing the Back Foot: Your back foot can be pointed or flexed, but don’t let it twist your knee. Keep the knee pointing straight down at the mat.
Practical Tips for the Everyday Yogi
- Use Props, Always: I don’t care if you’re a pro. Props are not a sign of weakness; they are a sign of wisdom. Sit on blocks. Put blankets under your back knee. Use your hands on the floor. Gravity is strong enough; you don’t need to fight it alone.
- Frequency over Intensity: You’re better off doing a 2-minute hamstring stretch every day than trying to force the splits for an hour once a week.
- Listen to the “Good Pain”: There’s a difference between the discomfort of stretching and the pain of injury. If it’s a dull ache in the belly of the muscle, breathe into it. If it’s a sharp, shooting pain behind the knee or in the hip joint, back off immediately.
Frequently Asked Questions About Hanumanasana
Q: How long does it take to master Hanumanasana?
A: Honestly? It depends. For some people with naturally open hips, it might take weeks. For others (like me), it took years of consistent practice. Don’t put a timeline on it. Your body is on its own schedule.
Q: Is Hanumanasana safe for beginners?
A: Yes, but with modifications. A beginner should not try to get their hips to the floor. A beginner should work on Half Split and Low Lunge, and maybe practice the shape with their hips elevated high on blocks. Respect the process.
Q: What muscles does Monkey Pose stretch?
A: The hamstrings on the front leg are targeted first, followed by the hip flexors in the rear leg (psoas). Stretches the quadriceps, groin area and also stretches it.
Q: Can I do Hanumanasana if I have a hamstring injury?
A: Generally, no. You should avoid deep hamstring stretches like this if you have a current tear or strain. Always check with a physical therapist or a qualified teacher.
Q: Why is it called Monkey Pose?
A: The pose is named for the Hindu monkey deity Hanuman who made a huge leap over the ocean. This pose represents that leap of courage and faith.
The Final Takeaway
I still don’t have a “perfect” Hanumanasana. Some days, my hips feel like concrete, and I’m barely an inch off the ground. Other days, I can get my chest to my shin. But that’s the point.
This pose isn’t about achieving a picture-perfect shape. It’s about showing up on your mat, accepting where you are that day, and taking a small step—or a small slide—toward opening up. It’s a practice in patience.
So, next time you roll out your mat, give it a try. Start in Half Split. Breathe. And remember, even Hanuman had to bend his knees before he could fly.