Introduction: Why Pigeon Pose is a Yoga Cornerstone
Let’s be honest. If you’ve spent more than five minutes on yoga Instagram, you’ve seen it. Someone, silhouetted against a sunset, folded gracefully into what looks like a human pretzel. That’s Pigeon Pose. It can seem intimidating, maybe even a little exclusive. But here’s the real secret they don’t always show you in the highlight reels: this pose isn’t about achieving a perfect picture. It’s about the honest, sometimes messy, journey of unlocking your body and finding a moment of profound quiet.
Whether you’re brand new to the mat and searching for pigeon pose for beginners tips, or you’re a curious yogi eyeing those impressive flying pigeon variations, this guide is for you. We’ll ditch the jargon and talk about what pigeon pose yoga really feels like, why its benefits are such a game-changer for modern life, and how to make it work for your body—not the other way around.
What is Pigeon Pose Yoga?
The Story Behind the Asana
Forget the Sanskrit name for a second (it’s Eka Pada Rajakapotasana, if you’re curious). Think about what the name “Pigeon” evokes. Not a tense, scrunched-up bird, but one puffing its chest out, cooing calmly. That’s the spirit. This pose is an active act of opening up, of creating space in a place where we all carry a lot of baggage—our hips.
The Anatomy of a Hip Opener
Let’s play a quick game. Think about your day: sitting at breakfast, commuting, at your desk, on the couch. Our bodies are in a near-constant state of flexion. Our hip flexors shorten, our glutes “fall asleep,” and our pelvis can tilt out of its happy place. This isn’t just about tightness; it can lead to that nagging lower back ache, that feeling of being “stiff,” and even impact our posture and mood.
Pigeon pose yoga is like hitting the reset button on all that. It’s a direct counter-movement to our chair-shaped lives. It asks our hips to do something different—to open, to rotate, to release. And in doing that simple, powerful act, it starts to undo the knots of our daily habits.
- Gluteus muscles (especially the gluteus medius and minimus)
- Deep external rotators (the piriformis, a common culprit in sciatica-like pain)
- Hip flexors of the back leg (iliopsoas)
- Inner thigh muscles (adductors)
This map allows us to approach the poses intelligently while respecting each individual’s anatomy.
Peogon Pose in Hindi: जानिए पिज़न पोज़ के बारे में सबकुछ
आपने कभी न कभी योग की क्लास में या ऑनलाइन वीडियो में पिजन पोज़ का नाम तो सुना ही होगा। इसे हिंदी में हम कबूतर मुद्रा कहते हैं। सुनने में तो ये बस एक और योगासन लगता है, पर मेरा विश्वास करिए, ये मुद्रा आपके पूरे शरीर और मन के लिए एक तोहफे जैसी है।
सीधे शब्दों में कहूँ तो, ये एक ऐसी मुद्रा है जो आपके कूल्हों में जमा हुई सारी जकड़न को खोलने का काम करती है। कल्पना कीजिए वो आराम से बैठा कबूतर, जिसका सीना फूला हुआ होता है। इस मुद्रा में भी कुछ वैसी ही भावना होती है – शांति, खुलापन और विश्राम।
Peogon Pose in Hindi: रोजाना अभ्यास के फायदे
हमारी रोज़ की ज़िंदगी देखिए – दिनभर कुर्सी पर बैठे रहना, गाड़ी में सफर, फिर घर आकर सोफे पर आराम। इस सबका सीधा असर हमारे कूल्हों पर पड़ता है। वो अकड़ जाते हैं, और ये अकड़न पीठ के निछले हिस्से में दर्द का बड़ा कारण बनती है।
पिजन पोज़ इन हिंदी या कबूतर मुद्रा, इस समस्या का एक बेहद सरल और प्रभावी उपाय है। ये न सिर्फ़ आपकी पीठ के दर्द से राहत दिलाती है, बल्कि:
तनाव कम करके मन को शांत करने में मदद करती है।
आपकी चाल में हल्कापन लाती है।
बैठने और खड़े होने के तरीके (पॉश्चर) को सुधारती है।
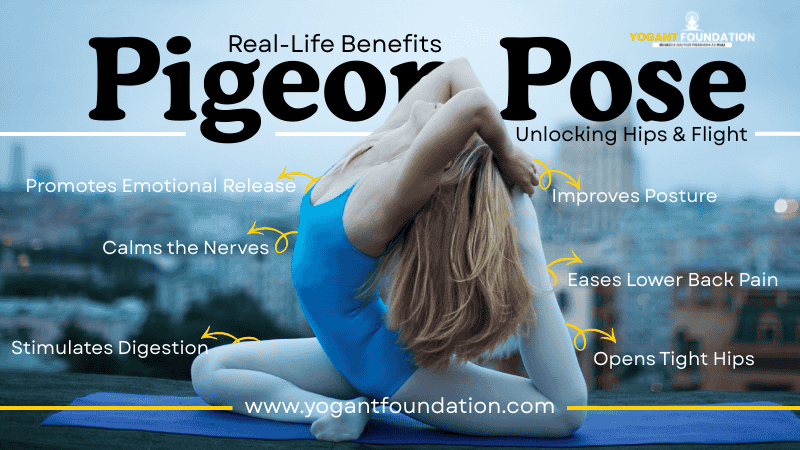
Pigeon Pose Benefits for Body and Mind
Okay, so it’s good for tight hips. But the pigeon pose benefits go so much deeper than flexibility. This is where it gets interesting.
Physical Benefits: Beyond Just Flexible Hips
- The Great De-Kinker: Primarily, it’s a superstar hip opener. It gently coaxes open the deep gluteal muscles (hello, piriformis) and the rotators. Say goodbye to that feeling of having concrete in your joints.
- A Gift for Your Back: Ever had a lower back that just won’t quit complaining? Tight hips are often the secret culprits. Pigeon releases tension and creates relief for the lumbar spinal column by relaxing the hips. Like a deep, satisfying sigh for your back.
- Standing Taller: When your hips are free, your pelvis can settle into a neutral position. This has a ripple effect up your entire spine. You might just find yourself standing with a little more ease and a little less slouch without even thinking about it.
- Prepping for Play: Want to eventually float into an arm balance or sink deeper into other poses? A open, stable hip is your foundation. Exploring flying pigeon variations starts right here, on the ground, in basic Pigeon.
Mental and Energetic Benefits
- The Stress Melt: There’s something about the forward fold version of Pigeon. As you rest your head and let gravity do its work, your breath naturally deepens. This physical act can signal to your nervous system that it’s safe to switch off the “go-go-go” mode. It’s a built-in mini-meditation.
- The “Junk Drawer” of the Body: You’ve probably heard it: the hips store emotion. While that’s a bit metaphorical, there’s truth to it. We hold physical tension from stress, anxiety, and past traumas in our bodies, and the hips are a major storage unit. A mindful Pigeon practice—where you breathe and observe without judgment—can create a safe space for some of that tension to melt away. It’s not uncommon to feel a sudden wave of emotion or even the urge to sigh or cry. That’s not weird; it’s release.
- A Lesson in Patience: This pose teaches you to be present. The sensation is often strong, so you can’t plan your grocery list. You have to listen to your body, breathe into the tight spots, and learn the difference between a “good” stretch and a “stop-now” pain. That’s a life skill, right there on the mat.
Pigeon Pose for Beginners
Approaching pigeon pose for beginners with patience is key. The full pose looks intense, that’s because it can be. Let’s break it down into manageable, kind steps. Your mission is not to look like the instructor, but to feel a good stretch without any sharp pain.
Step-by-Step Alignment Guide
Start in Your Own Warm-Up:
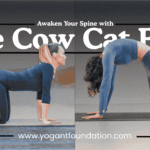
Don’t jump into Pigeon cold. Do some Cat-Cow circles, a few gentle Downward Dogs, some low lunges. Get your body whispering before you ask it to have a deep conversation.
Come to a Tabletop:
Start on your hands and knees. This feels more stable than launching from Downward Dog as a beginner.
Bring Your Knee Forward:
Slide your right knee up towards your right wrist. Now, here’s the key: let your right shin lay down on the mat at whatever angle feels okay on your knee. For some, it’s diagonal towards the left hip. For others, it can be more parallel to the front of the mat. Your knee’s comfort is the boss.
Extend the Other Leg:
Gently walk your left leg back, letting the top of your foot relax on the mat. Don’t force it straight; a slight bend is fine.
Find Your Hands:
Place your hands on the mat in front of you, framing your right shin. If you feel a pinching in your right knee, stop. Back out and try the prep pose below.
The Two Choices:
- Option A (Upright): Keep your hands down, spine long. Just sit here and breathe. Feel the stretch in your right hip.
- Option B (Forward Fold): Inhale to grow tall, then exhale as you walk your hands forward, lowering your chest towards the floor. You can only push yourself as far you are able to while maintaining a relaxed breathing pattern. Rest your forehead either on your palms, a mat, or a block.
Stay & Breathe:
Hold for 5-10 slow breaths. The goal is to soften with each exhale.
Exit Gently:
Press gently through your hands, tuck your back toes, and push back to a Child’s Pose for a moment. Ahhh. Then repeat on the other side.
Essential Props and Modifications for Beginners
Using props isn’t cheating; it’s smart yoga. They make the pose accessible and safe.
- For Knee or Hip Discomfort: Slide a folded blanket, cushion, or yoga block under the hip/buttock of your bent leg (the right side in our example). This lifts you up and takes immense pressure off the knee. This one tip is a game-changer.
- For the Forward Fold: Can’t reach the floor? Stack two blocks under your forehead or chest. Or hug a pillow or bolster. The support lets your nervous system relax into the stretch.
Try This First: Reclined Pigeon (Figure-Four Stretch): Lie on your back, cross your right ankle over your left thigh, and hug your left thigh in. You’ll feel a similar stretch in your right hip with zero weight on your knee. It’s the perfect introduction.
Beginners’ Tip: Start with a gentler prep pose like Figure-Four stretch (Reclined Pigeon) on your back to understand the sensation without bearing weight.
Exploring Flying Pigeon Variations
Once you’ve built a friendly relationship with regular Pigeon and have some core and arm strength from poses like Plank and Chaturanga, you might get curious about taking flight. Flying pigeon variations look like magic, but they’re built on simple mechanics: balance, trust, and a good sense of humor.
1. Eka Pada Galavasana (Flying Pigeon Pose)
Think of this not as a totally new pose, but as Pigeon deciding to get a little adventurous.
- From your upright Pigeon (right leg forward), plant your hands firmly, spreading your fingers wide. Shift your weight forward until your shoulders are over your wrists.
- Bend your back (left) knee and draw that foot in. Now, hook your left ankle over your right ankle. It’s like giving yourself a little leg-hug.
- This is the leap of faith: start to lean forward even more, engaging your lower belly like you’re zipping up a tight pair of jeans. As you lean, you’ll feel your right foot get lighter. Let it lift an inch off the floor. Your bent right knee will rest on the back of your right arm.
- Your gaze is forward, not down. You’re not collapsing; you’re creating a seesaw balance.
2. Parivrtta Eka Pada Rajakapotasana (Revolved Flying Pigeon)
This twisted variation adds a detoxifying and balancing element.
- From Flying Pigeon prep, instead of leaning straight forward, begin to rotate your torso to the right.
- Bring your left elbow to the outside of your right knee, or take a bind with your hands if accessible.
- The twist deepens as you continue to engage your core and find your balance point.
Tips for Flying Pigeon Success
- Practice Near a Wall: Set up with your back to a wall. When you lean forward to lift, your lifted toes can tap the wall. This gives you the confidence to find the balance point without fear of tipping over backwards.
- Strength First: Can you hold a Crow Pose for a few breaths? That’s your benchmark for the arm and core strength needed.
- Celebrate the Attempt: The first time I tried this, I flopped. The tenth time, I wobbled. The hundredth time, I held it for a breath. Every single one of those attempts made me stronger. The “flight” is in the trying.
Integrating Pigeon Pose into Your Practice
When to Practice Pigeon Pose
Don’t save it for a full 60-minute class. Pigeon is incredibly versatile.
- After a Walk or Run: It’s the perfect counter-stretch for tight runner’s hips and glutes.
- At Your Desk (Seriously): Try the Reclined Pigeon stretch in your office chair. Cross your ankle over the opposite knee and gently lean forward.
- As a Wind-Down Ritual: Before bed, do a supported Pigeon on each side with a bolster, focusing only on deep, calming breaths. It’s better than scrolling.
Complementary Pigeon Pose Yoga Sequences
- For Hip Opening Flow: Low Lunge → Lizard Pose → Pigeon Pose → Supine Twist.
- For Relaxation: Gentle Cat/Cow → Child’s Pose → Supported Pigeon (with props) → Legs-Up-The-Wall.
Common Mistakes to Avoid
- Knee Pain: If there’s any sharp, stabbing, or pinching pain in the knee of your bent leg, stop. Use more props, choose a gentler angle for your shin, or switch to Reclined Pigeon.
- Sensation vs. Pain: A deep, “oh wow, that’s intense” feeling in your hip or glute is usually okay. A sharp, electric, or localized joint pain is not. Learn the difference.
- Breathe: If you find yourself holding your breath, you’ve gone too deep. Breathe slowly until you’re able to breathe again.
Pigeon Pose FAQs
Q: What is the pigeon pose good for?
Think of it as a master key for tight hips. If you sit a lot, run, or cycle, your hips get stiff. This pose is a direct, deep stretch for those muscles. It’s also famous for helping ease that nagging lower back ache that comes from sitting all day and can be a weirdly quick way to calm your nervous system.
Q: Is pigeon good for hips?
Yes, but “good” means “intense.” It targets the deepest, tightest parts of your hips and glutes that most stretches don’t reach. If your hips are tight, this pose will let you know—and then help you slowly open them up.
Q: How long should you do the pigeon pose for?
Aim for 5 to 10 slow, deep breaths on each side. If that’s too much, start with 3 breaths. If you’re using lots of props and feeling cozy, you can stay for 2-3 minutes for a super relaxing effect. Listen to your body’s clock, not the one on the wall.
Q: What happens if I do pigeon pose every day?
You’d probably notice your hips feeling looser and lighter within a couple of weeks. You might stand up straighter without thinking about it, and that lower back tension could start to fade. The key is gentleness. Doing it daily with a kind, patient approach works wonders. Doing it daily while forcing yourself into a deep stretch can lead to strain.
Q: Can beginners do pigeon pose?
Absolutely, yes. But a beginner’s version looks different. Your job isn’t to fold in half. Your job is to find a version where you feel a strong but manageable stretch, with zero pain in your knees.
Q: What is the #1 mistake that makes bad knees worse?
Twisting them under pressure. If your knee is bent and bearing weight (like your front knee in Pigeon), and you then twist it to get “deeper,” you’re asking for trouble. Knee comfort is non-negotiable. If it complains, add more height under your hip or do a different stretch.
Q: Who should not do pigeon pose?
If you have a current or serious knee or hip injury (like a recent tear or replacement), you should talk to a physio before trying this. If you have significant SI joint pain, this asymmetrical pose might flare it up. When in doubt, get professional advice.
Q: Why is pigeon pose so emotional? / Why does it make you cry?
It can be. It sounds strange, but it’s common. Our bodies hold onto stress and emotion, and the hips are a major storage unit. When you finally release that deep physical tension, sometimes emotional tension comes out with it. A sigh, a few tears, a sudden feeling of relief—it’s all a normal part of letting go. It means you’re doing it right.
Q: Can you release trauma through yoga?
This is a big, important question. Gentle, mindful yoga can help you feel safe in your body again and release stored physical tension, which is often tied to stress or trauma. It’s a powerful tool for healing. It’s better to use it as support alongside therapy, with a professional qualified in the field, and not replace it.
Conclusion: Your Pose, Your Journey
So, here’s the real talk on pigeon pose yoga. It doesn’t matter if you’re folded over a stack of pillows or effortlessly floating into a flying pigeon variation. What matters is that you showed up for yourself.
The true pigeon pose benefits aren’t just in a more flexible hip. They’re in the three minutes of quiet you gave your mind. The patience you learned when your body said “not today.” They’re in the empowerment of using a block without an ounce of shame.
Roll out your mat tonight. Try it. Breathe into it. Be kind. And remember, whether you’re a grounded beginner or an aspiring flyer, every version of Pigeon is perfect, because it’s yours.