Let’s be real for a second. How often do you find yourself parked in a chair, only to stand up feeling like your hips have been replaced with rusty door hinges? I’ve been there. You stretch forward, you maybe do a Downward Dog, but that deep, nagging tightness in your hips and inner thighs just… lingers. For years, I thought Pigeon Pose was the only answer. Then, I met Skandasana (pronounced skan-DAHS-uh-nuh), and honestly, it was a game-changer.
You might see it in a flow class and think, “Oh, just a fancy side lunge.” But trust me, it’s so much more than that. This pose is a secret weapon for anyone who wants to feel strong, open up their hips, and add a little graceful power to their movement. It’s the pose I didn’t know I was missing, and now, I can’t imagine my practice without it.
So, grab your mat, and maybe a block if you have one handy. Let’s chat about this incredible pose. No pressure, no perfection—just you, me, and the journey of finding a little more space in our bodies.
What is Skandasana? Decoding the Name and the Myth
Before we get into the “how,” let’s talk about the “what.” The name sounds intimidating, but it has a cool story.med
The Translation: Who is Skanda?
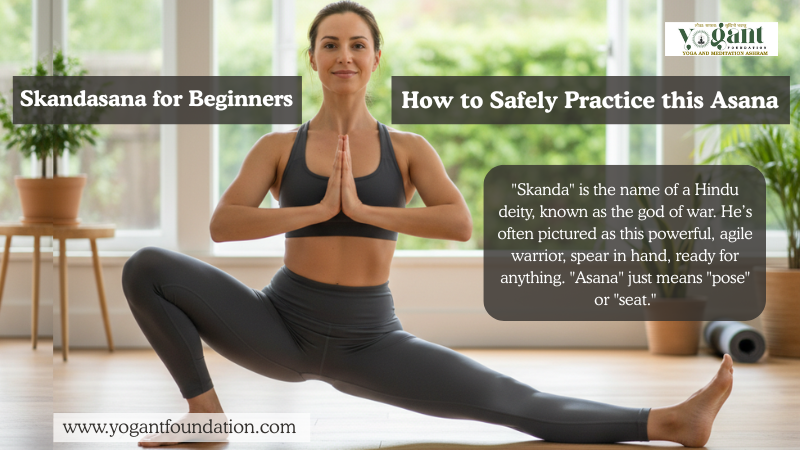
“Skanda” is the name of a Hindu deity, known as the god of war. He’s often pictured as this powerful, agile warrior, spear in hand, ready for anything. “Asana” just means “pose” or “seat.”
So, Skandasana is literally “the pose dedicated to the warrior god.”
Now, don’t let the “war” part scare you off. I don’t think of it as a pose of aggression. To me, it embodies the spirit of a warrior: grounded, stable, resilient, and ready to move with purpose. When you’re in it, one leg is bent and solid like an anchor, and the other is long and extended, like that ready spear. You feel both powerful and expansive at the same time.
It’s about finding your own inner strength, that quiet, steady part of you that can hold a challenging position and breathe through it.
Top 4 Amazing Skandasana Benefits
I know, I know, every yoga pose comes with a list of “amazing benefits.” But with Skandasana, you actually feel them, often immediately. Here’s what this pose is doing for you, in plain English:
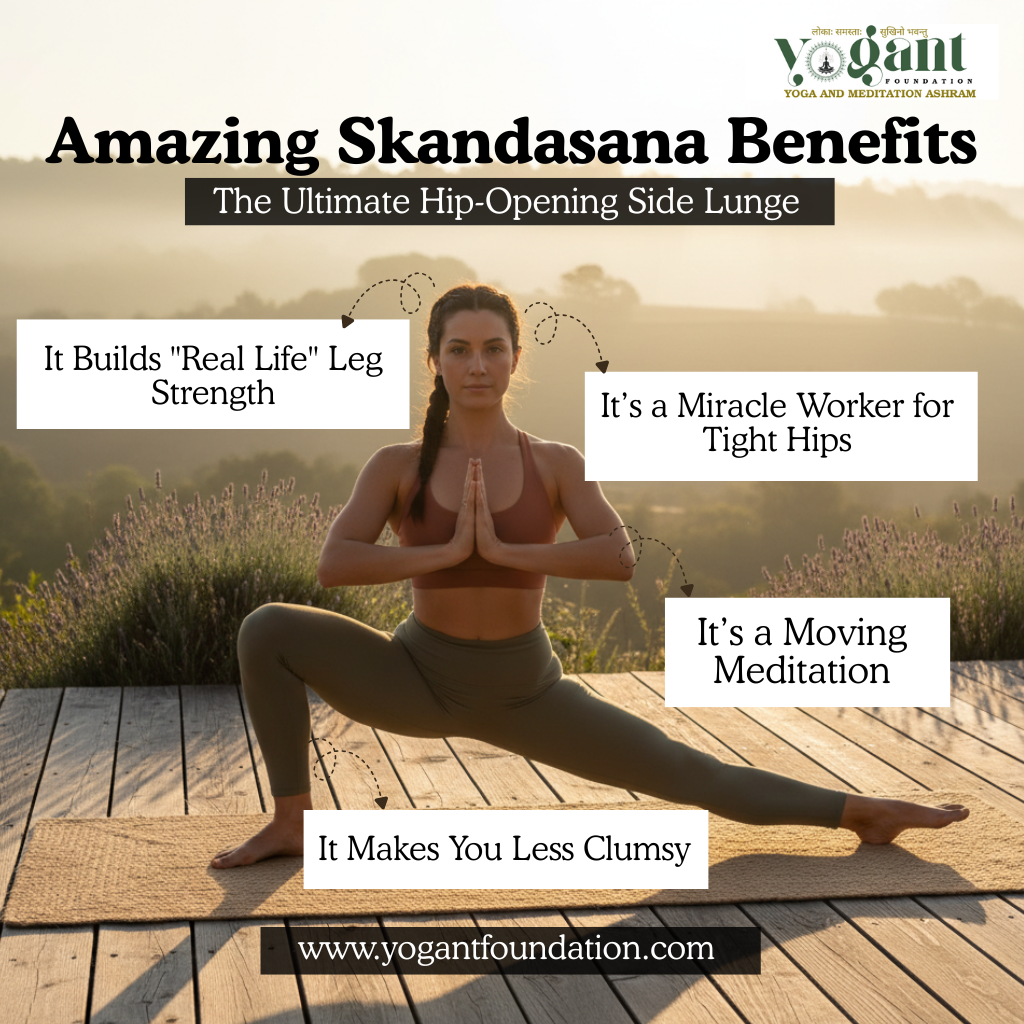
1. It’s a Miracle Worker for Tight Hips: If you sit all day, your hips are probably throwing a constant, silent tantrum. Skandasana speaks their language. It coaxes them open in a way that feels both intense and fantastic. The bent-leg side gets a deep hip stretch, while the straight-leg side gives your inner thigh a glorious release. It’s a two-for-one deal for hip freedom.
2. It Builds “Real Life” Leg Strength: This isn’t just about looking good in yoga pants. The strength you build here is the kind that helps you power up a flight of stairs, lift a heavy grocery bag, or get up off the floor playing with your kids without going “oomph.” Your quads, glutes, and inner thighs all get in on the action.
3. It Makes You Less Clumsy (Seriously!): Your proprio-what? Proprioception—it’s your body’s internal GPS. It’s what tells you where your limbs are without looking. Skandasana challenges your balance in a new way, fine-tuning that GPS. You’ll feel more stable and coordinated in everything you do.
4. It’s a Moving Meditation: The first time you try to hold it, your brain might be screaming, “THIS IS UNCOMFORTABLE! ABORT MISSION!” But then you remember to breathe. You focus on a spot on the floor. Suddenly, you’re not just holding a hard pose; you’re practicing mindfulness. You’re learning to stay calm and focused even when things get intense—a skill that’s pretty handy off the mat, too.
The Foundational Skandasana: A Step-by-Step Guide
Let’s get into the nitty-gritty. Here’s my step-by-step, no-BS guide to getting into Skandasana. Move slowly, and for heaven’s sake, breathe.
Step 1: Get Into a Wide Stance
Start standing. Take a big, generous step out to the side with each foot. We’re talking wider than you think. You should feel stable, not like you’re about to do the splits. Your feet can be parallel, or your toes can turn out just a tiny bit.
Step 2: The Big Shift
This is the key move. Inhale to stand tall. Now, as you exhale, imagine someone has a string tied to your right hip bone and is pulling it massively to the right. I mean, really shift your weight over. Don’t be shy. Your torso will naturally lean to the left to counterbalance—that’s perfect!
Step 3: Bend and Straighten
As you shift, let your right knee bend deeply. Aim to get your right thigh as parallel to the floor as your body allows today—no forcing! At the same time, send energy through your left leg and straighten it completely. Keep that left foot firmly planted. You should feel a deep stretch waking up along your left inner thigh.
Step 4: Find Your Hands
Now, what to do with your arms? The classic version is to place your hands on the floor, framing your bent (right) leg. This gives you support and helps you keep your spine long.
- Can’t reach the floor? NO WORRIES. This is where your yoga block becomes your best friend. Place your hands on a block on either side of your foot. Or, just rest your hands on your bent-leg thigh. Do what you need to do to keep your back from rounding.
Where to Look & How to Breathe:
Your gaze can be soft, looking down at the floor in front of you. Take 3-5 deep breaths here. Feel your hips opening on the inhale, and see if you can sink a tiny bit deeper on the exhale.
To Come Out:
Press firmly through both feet, engage your core, and powerfully push yourself back to your wide-legged stand. Take a breath in the center, and then repeat everything on the other side. Be prepared—the second side always feels different!
Variations and Modifications of Skandasana
Listen, my version of Skandasana might not look like yours, and that is 100% okay. The goal is to feel the right kind of challenge, not sharp pain. Here’s how to make it work for YOU.
If your heels won’t stay down:
Welcome to the club! This is super common. The heel of your bent leg might pop up. If that’s you, slide a folded blanket, a towel, or even a book under that heel. It’s like giving your ankle a little pillow and makes the pose so much more accessible.
If your back is rounding like a angry cat:
This usually means your hamstrings are tight. Please, for the love of your spine, use blocks under your hands or put your hands on your thigh. Keeping your spine long is way more important than touching the floor.
If you feel a pinchy feeling in your bent-leg hip:
Yikes, we don’t want that. This often means you’re sinking too deep for your current mobility. Come up a little bit. Don’t bend your knee as much. Focus on length in your torso first, depth second.
If your straight leg foot keeps turning out:
It’s trying to cheat! That foot wants to turn out to make the stretch easier. Gently encourage those toes to point more forward. You might need to shorten your stance a bit to make this happen.
Ready for a Challenge? Let’s Spice It Up!
Once the basic pose starts feeling like an old friend, you can play with some fun variations.
- Add a Twist: From your lunge, place your left hand on the floor (or a block) inside your right foot. Inhale, and sweep your right arm up to the ceiling, opening your chest. Gaze up at your hand if it feels good on your neck. It’s a fantastic way to wring out tension in your upper back.
- Get Flowy: Instead of holding it, move with your breath. Inhale to center, exhale to lunge right. Inhale to center, exhale to lunge left. It becomes a beautiful, meditative dance that gets your heart pumping.
- Eagle Arms: If you’re feeling super balanced, try wrapping your arms into Eagle arms (right arm under left, wrap and press palms if you can). It’s a shoulder opener and a balance challenge all in one!
Weaving Skandasana Into Your Life
You don’t need a full 90-minute class to benefit from this pose.
- Quick Morning Wake-Up: Do 5 flowing rounds (right and left count as one) first thing in the morning to shake off the stiffness.
- In Your Workout: Throw it into your leg day routine as a warm-up or finisher. Your glutes will feel it!
- Desk Break Savior: Step away from the computer, take a wide stance, and do a few slow side lunges on each side. It’s an instant reset for your posture.
The Real Talk: It’s a Practice, Not a Perfect
Some days, I sink into Skandasana and feel like a powerful, graceful warrior. Other days, my hips feel like concrete, and I can barely bend my knee. And both of those days are perfectly okay.
This pose, like everything in yoga and in life, is a journey. The goal is not to achieve a perfect Instagram photo. Showing up to your mat and listening to your body’s message today is what matters.
So the next time you unroll your mat, I invite you to make a little space for Skandasana. Play with it. Explore it. Laugh when you wobble. Celebrate the small victories—the day your heel stays down, the day you feel a little more open.
Your hips have been waiting for this. You’ve got this.
FAQ: Your Questions, Answered Simply
Q: My knee is kinda fussy. Is this pose safe?
A: Be super careful. Always check with a doctor or physio first. If you get the green light, focus on alignment: make sure your bent knee never sneaks past your ankle, and keep it tracking in line with your middle toe. Using a block under your heel and not going so deep can be a game-changer for knee comfort.
Q: How long should I actually hold it?
A: It depends! If you’re moving to warm up, one breath per side is great. If you’re trying to build strength and flexibility, try for 3-5 deep, slow breaths on each side.
Q: Can this help with sciatica pain?
A: It can go either way. For some people, opening the hips relieves the pressure on the sciatic nerve. For others, it can irritate it. This is a “listen to your body” moment. If you feel any shooting or sharp pain, STOP. If you have ongoing sciatica, professional guidance is a must.
Q: I’m pregnant. Can I do this?
A: Congrats! The wide stance can feel really good. But pregnancy is not the time for deep stretching (thanks, relaxin hormone!). Use a block for your hands, don’t sink too deep, and for sure skip the twist variations. As always, talk to your doctor and find a prenatal yoga teacher for guidance.